Filter Conditions in Adhoc Analysis
- By following this document user will know how to use Filter Conditions in Adhoc Anaysis.
Prerequisites
This Filter Condition work with Pipeline dataset only.
For this example we are using Analysis Filter.pipeline dataset
Download dependency file from link given Link. After downloading the file, upload Analysis Filter.pipeline into the AIV dataset section.
Skill Level Required
- No prior knowledge of Adhoc Analysis required but knowladge of binary filter conditions will be advantageous. Click here to know more about Adhoc Analysis in detail.
Use Filter Condition
Log in to your AIV application using your valid credentils.
Go to hamburger menu
 > Document > Adhoc Analysis & click on the + icon to create a new Analysis, as shown in the figure below:
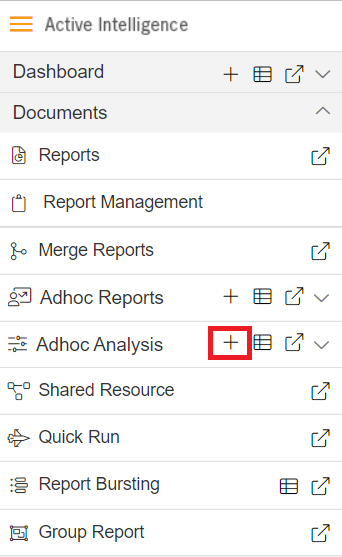
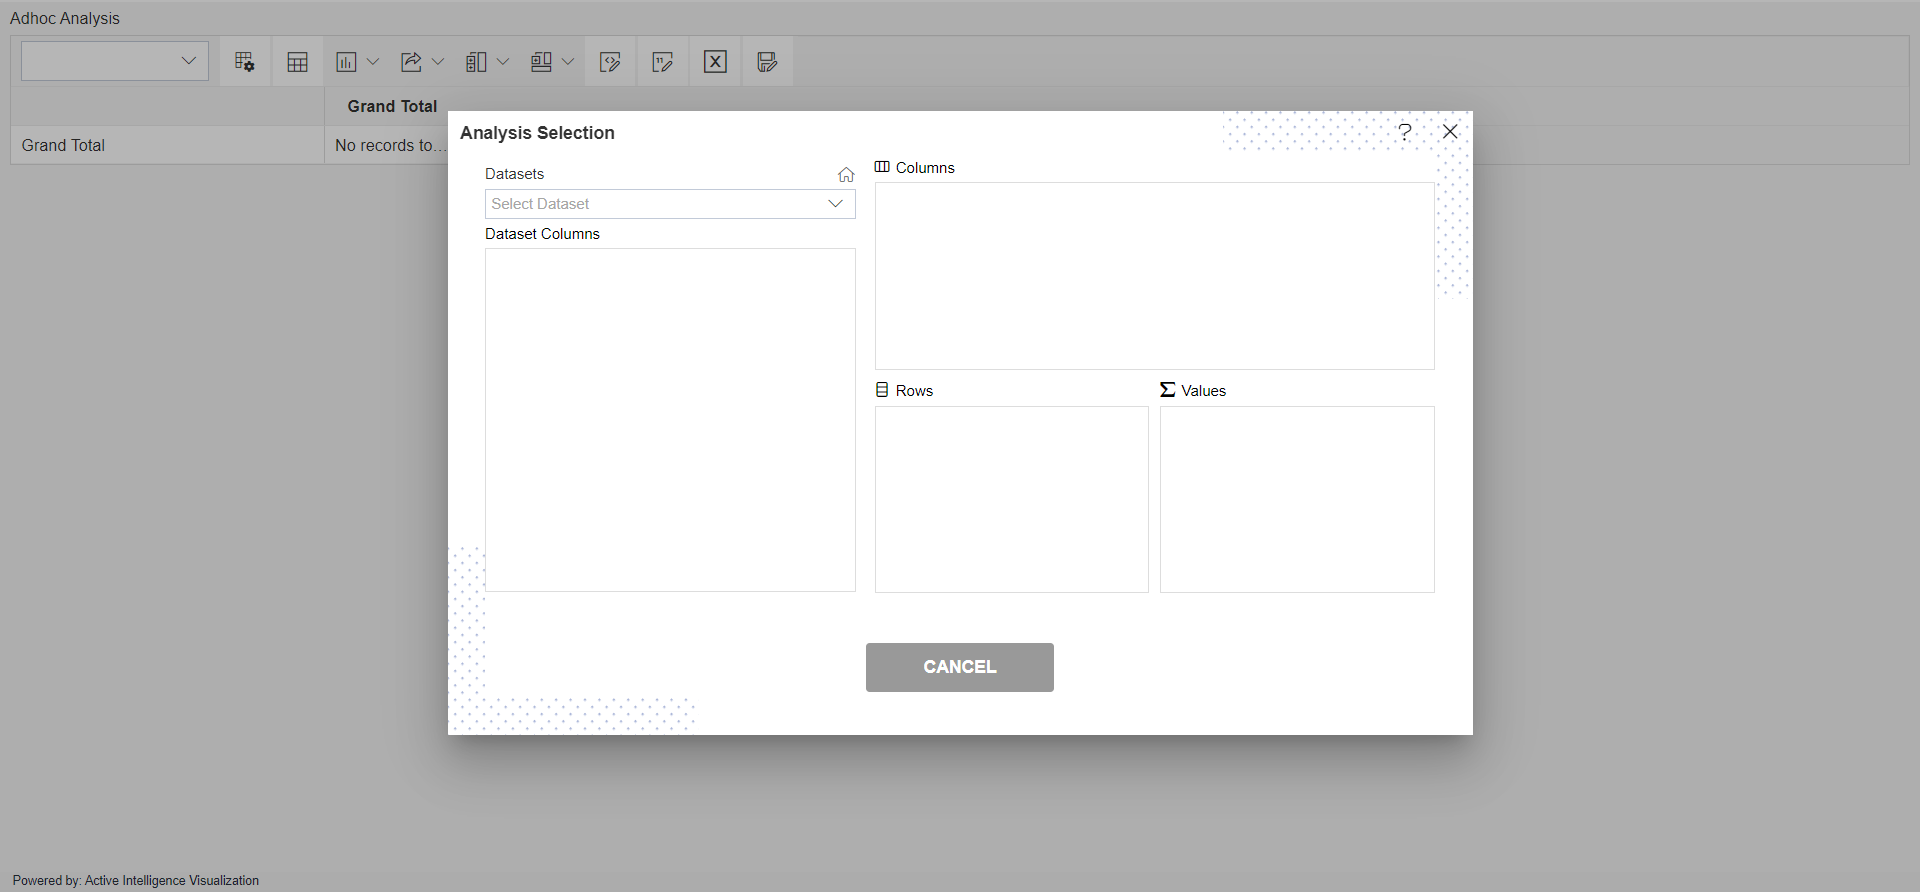
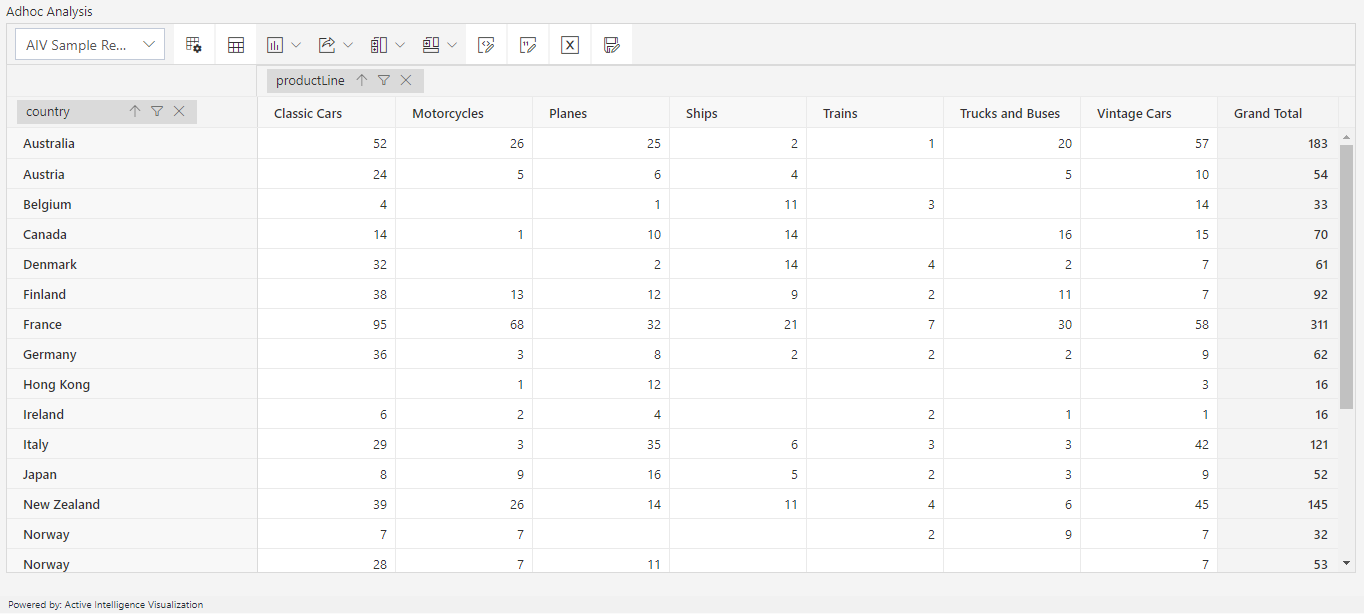
When you click on create Analysis then the Analysis Selection dialog box will open, as shown in the figure below:
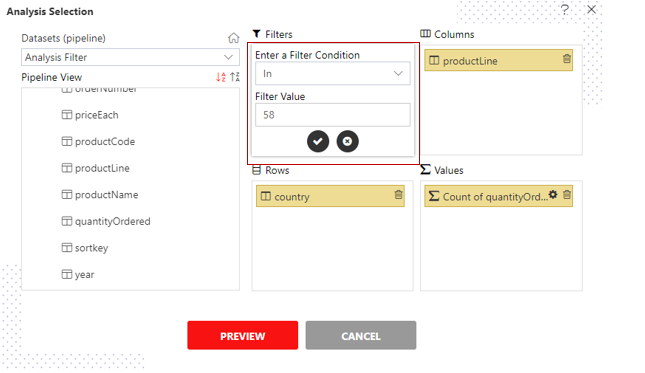
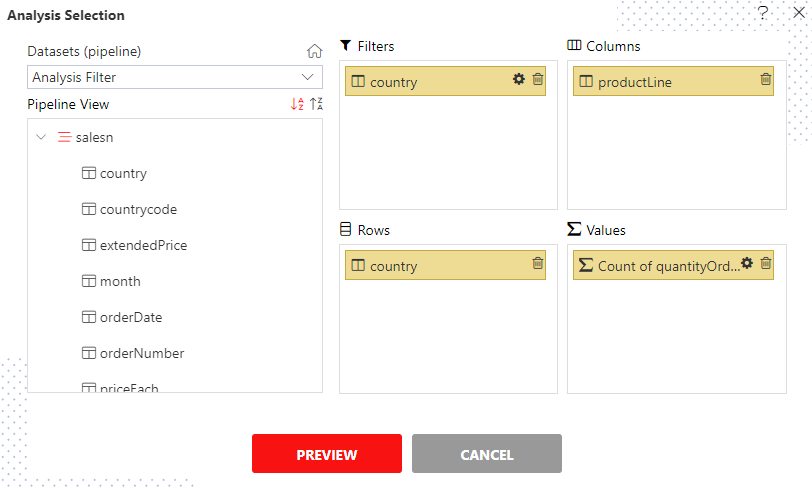
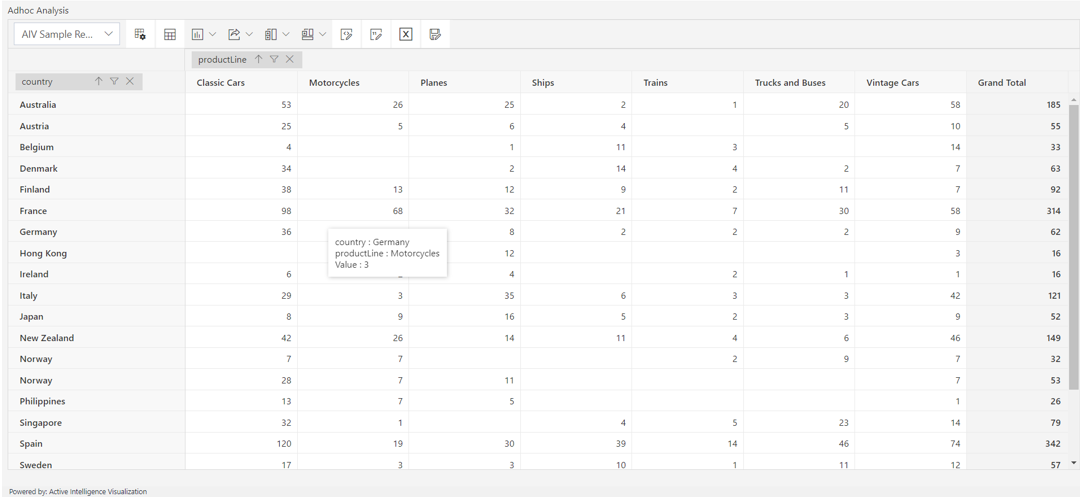
In Analysis Selection window fill the dtails as shown in the image below:
- Datasets: Analysis Filter
- Rows: country
- Columns: productLine
- Values: quantityOrdered (Type:Count)
- Filters: QuantityOrdered
IN
- IN Condition allows user to easily test if an expression matches any value in a list of values selected. with IN condition, you will get multiselect dropdown and you can select multiple values from it.
Click on setting icon at the Filters option as shown:
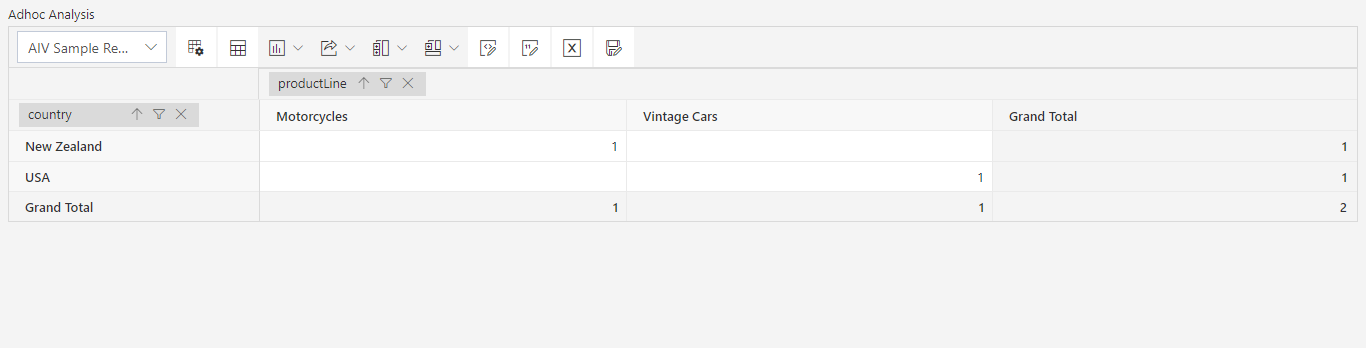
Click on ✓ icon & PREVIEW button.
As you click on CANCEL button, the window will look as per the image below:
In order to save analysis, click on save as button. provide unique name of analysis and click on save button to save analysis.
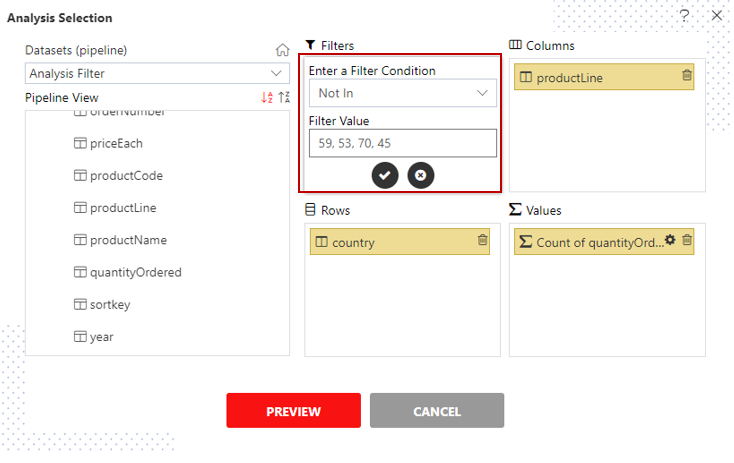
NOT IN
- NOT IN Condition shows the list of values, which is not matched with selected values. it works just opposite of IN condition.
Now again go to the setting icon at the Filters option with refrence to in step np- 5 & fill the details as shown:
Click on ✓ icon & PREVIEW button.
As you click on CANCEL button, the window will look as per the image below:
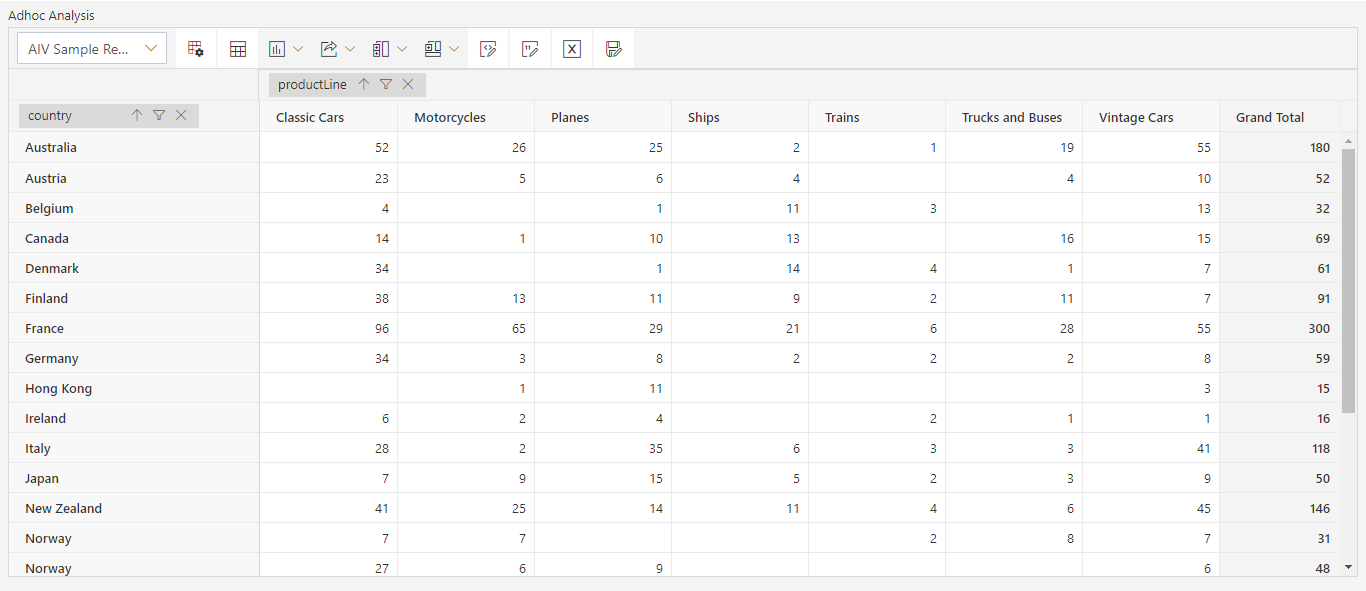
- results will be returned except selected values.
In order to save analysis, click on save as button. provide unique name of analysis and click on save button to save analysis.
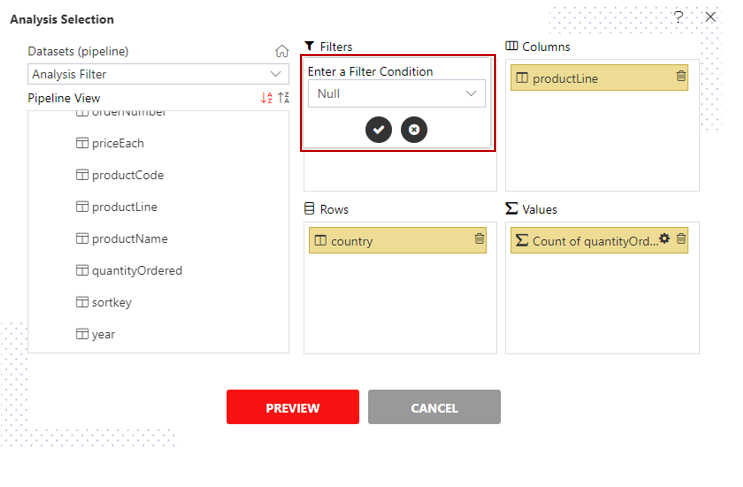
NULL
- It will display the columns that contains a null value or when a value is missing or unknown.
Now again go to the setting icon at the Filters option with refrence to in step no- 5 & fill the details as shown:
Click on ✓ icon & PREVIEW button.
As you click on CANCEL button, the window will look as per the image below:
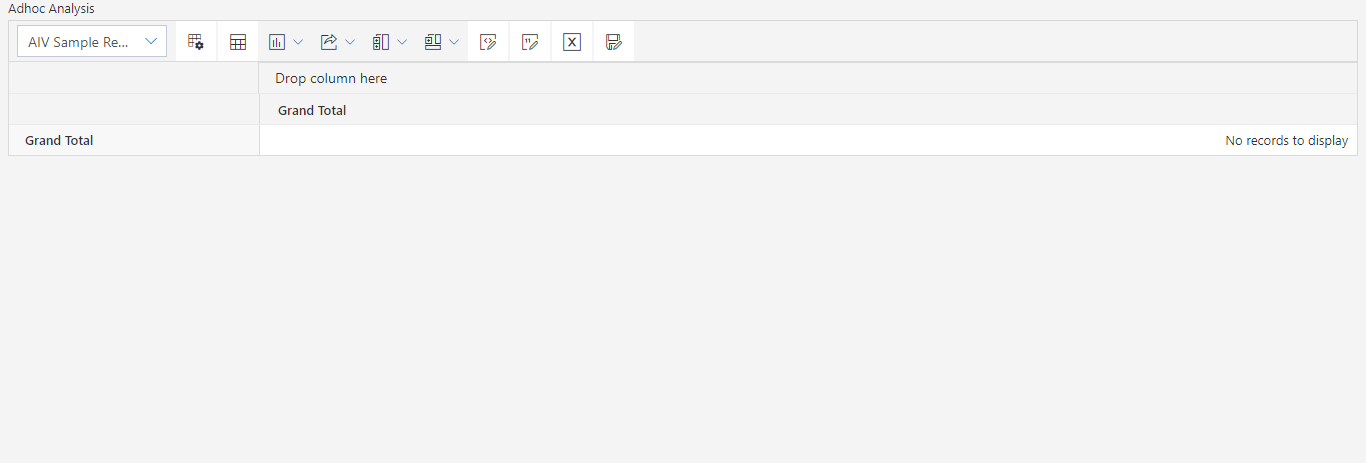
- Here there is no null value in selected column so it returns no result
In order to save analysis, click on save as button. provide unique name of analysis and click on save button to save analysis.
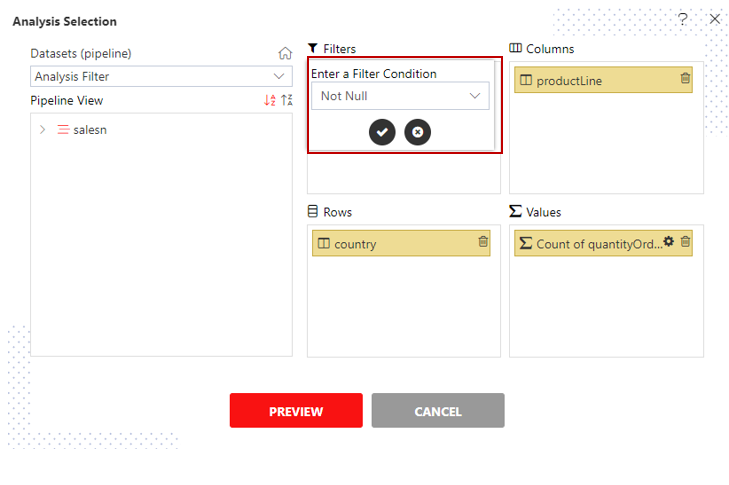
NOT NULL
- The NOT NULL condition returns column data which is not null. Here we can ensures that all fields of that column will contain a value and no null value will be displayed
Now again go to the setting icon at the Filters option with refrence to in step no- 5 & fill the details as shown:
Click on ✓ icon & PREVIEW button.
As you click on CANCEL button, the window will look as per the image below:

In order to save analysis, click on save as button. provide unique name of analysis and click on save button to save analysis.
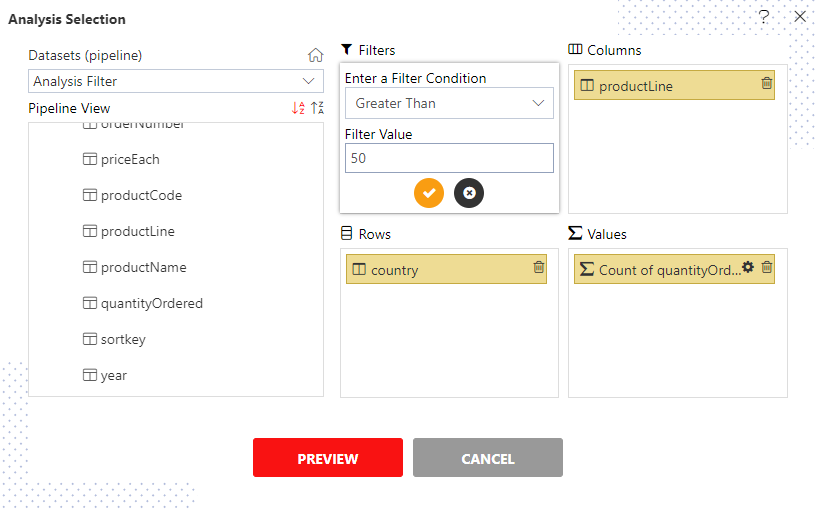
Greater Than
- Greater than Condition is used when user wants to see the list of values, which is greater than the entered value. with Greater than condition, you will have blank text box where user can enter required value manually.
With current release, this function will not supported with date-time data. it will only work with decimal values.
Now again go to the setting icon at the Filters option & enter the filter values as shown:
Click on ✓ icon & PREVIEW button.
As you click on CANCEL button, the window will look as per the image below:
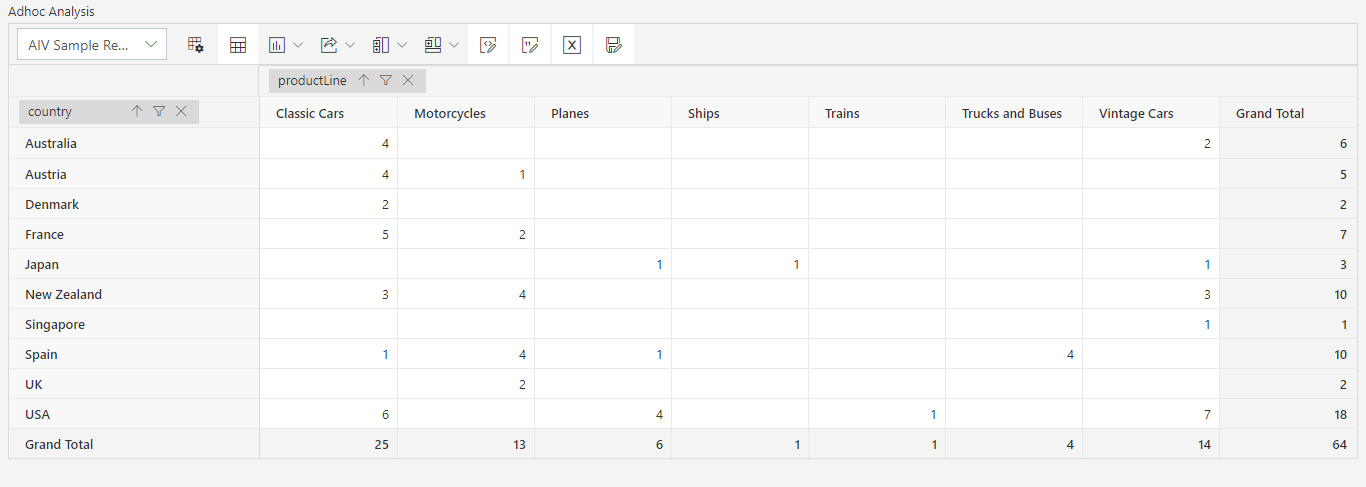
- You can see data displayed are grater than the condition value applied
In order to save analysis, click on save as button. provide unique name of analysis and click on save button to save analysis.
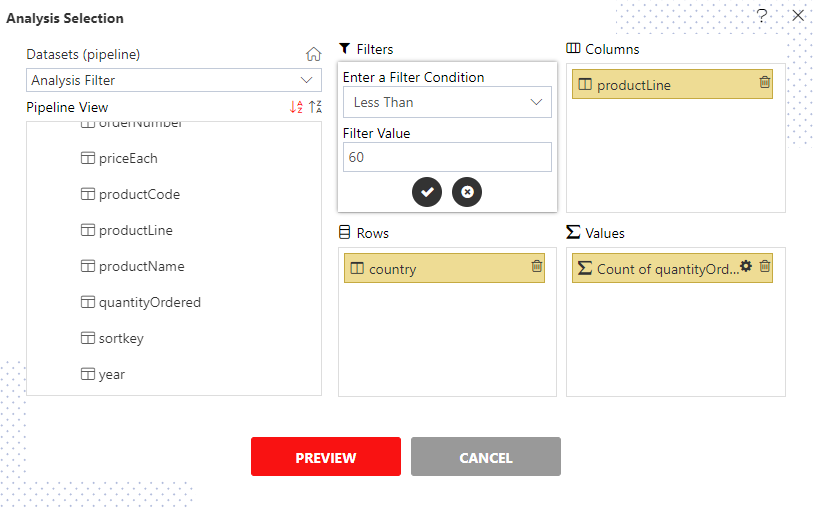
Less Then
- Less than Condition is used when user wants to see the list of values, which is Less than the entered value. with Less than condition, you will have blank text box where user can enter required value manually.
Now again go to the setting icon at the Filters option & enter the filter values as shown:
Click on ✓ icon & PREVIEW button.
As you click on CANCEL button, the window will look as per the image below:
- You can see data displayed are less than the condition value applied
In order to save analysis, click on save as button. provide unique name of analysis and click on save button to save analysis.
LIKE
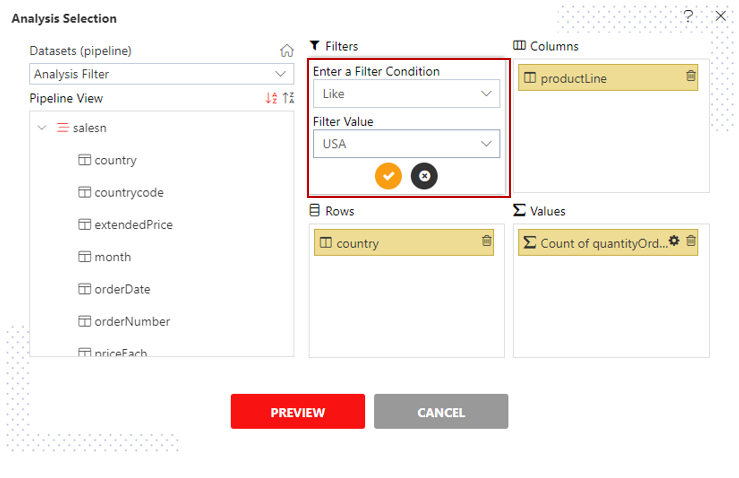
- The LIKE condition allows you to match a string to value. It is a logical operator that checks whether a string contains a specified value.
To check this condition,delete previous column from filters by clicking on delete icon provided and add country column in Filters.
Select condition & fill the details as shown:
Click on ✓ icon & PREVIEW button.
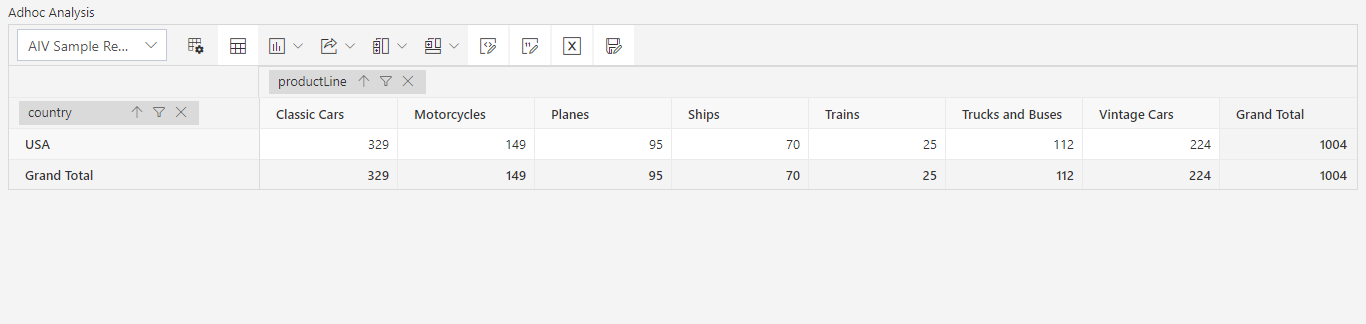
As you click on CANCEL button, the window will look as per the image below:
In order to save analysis, click on save as button. provide unique name of analysis and click on save button to save analysis.
NOT LIKE
- This condition works just reverse as Like condition do. it will filter out value we have selected and shows remaining values.
Now again go to the setting icon at the Filters option select condition as NOT LIKE & fill the details as shown:
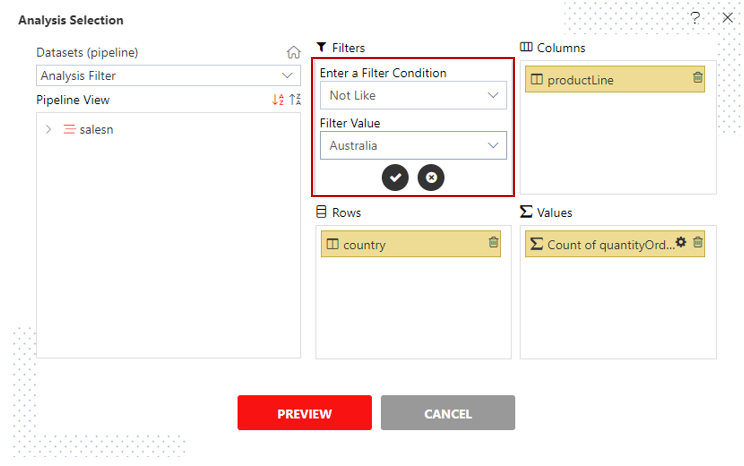
Click on ✓ icon & PREVIEW button.
As you click on CANCEL button, the window will look as per the image below:

- As per condition selected, you will see data of Australia will be filtered.
In order to save analysis, click on save as button. provide unique name of analysis and click on save button to save analysis.
Equal To
- This filter option is used to filter columns values when found exact match. Here you will not get the multiselect, user will get only list box instead. in case user wants to filter data with multiple value, he can use IN condition.
Go to the setting icon at the Filters option & fill the details as shown:
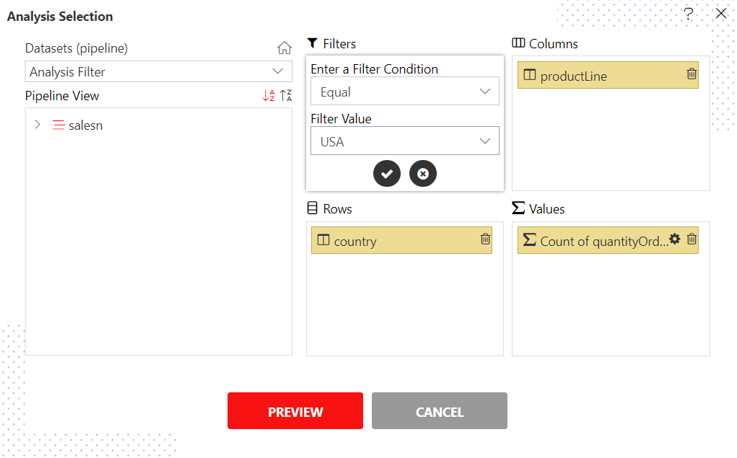
Click on ✓ icon & PREVIEW button.
As you click on CANCEL button, the window will look as per the image below:
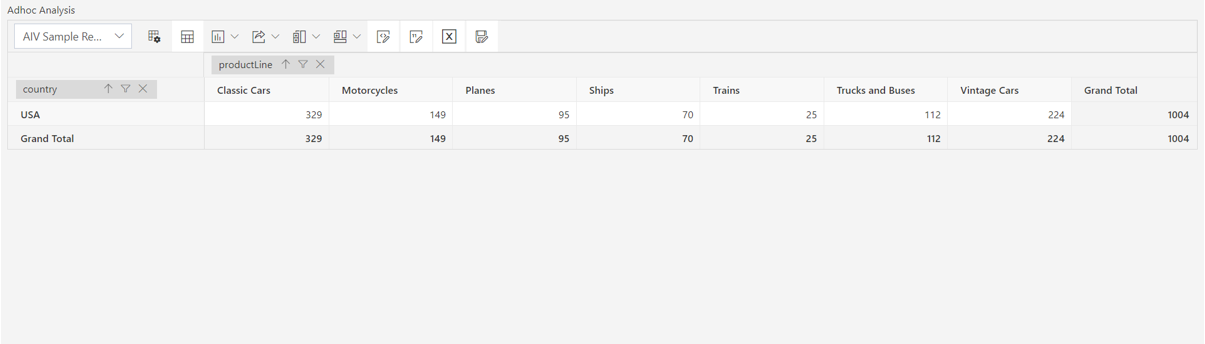
In order to save analysis, click on save as button. provide unique name of analysis and click on save button to save analysis.
NOT Equal To
- This type of filter will work just opposite to Equal to filter. In this Filter type, the condition and value applied will be skipped and the remaining values of the column will be displayed.Here you will not get the multiselect, user will get only list box instead. in case user wants to filter data with multiple value, he can use NOT IN condition.
Go to the setting icon at the Filters option & fill the details as shown:
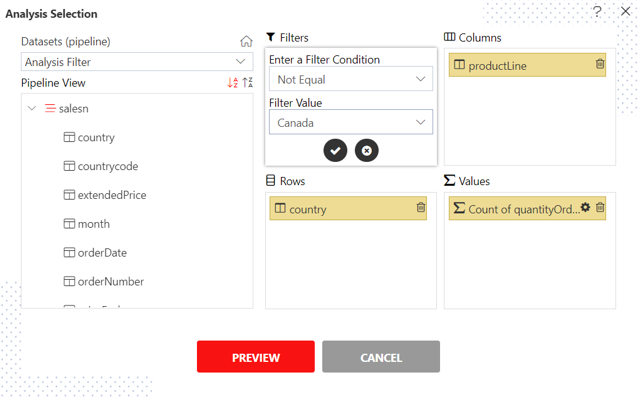
Click on ✓ icon & PREVIEW button.
As you click on CANCEL button, the window will look as per the image below:
In order to save analysis, click on save as button. provide unique name of analysis and click on save button to save analysis.
Greater Than Equal to
- This condition will work same way as Greater Than the only difference is grater than will shows data grater than selected value and Greater Than Equal to will show data which is grater than and equal to selected value.
Less Than Equal to
- This condition will work same way as Less Than the only difference is less than will shows data grater than selected value and Less Than Equal to will show data which is less than and equal to selected value.